Proxmox-Based Cybersecurity Lab - Active Directory, Monitoring & Malware Analysis
Most cybersecurity labs focus on isolated machines and basic exploitation. This lab was designed to simulate a structured internal environment with segmentation, monitoring, and controlled attack paths, closer to how real enterprise systems operate.
The goal was to move beyond standalone attack setups and build a system that reflects both attacker and defender perspectives, emphasizing how infrastructure is designed, monitored, and secured.
Overview
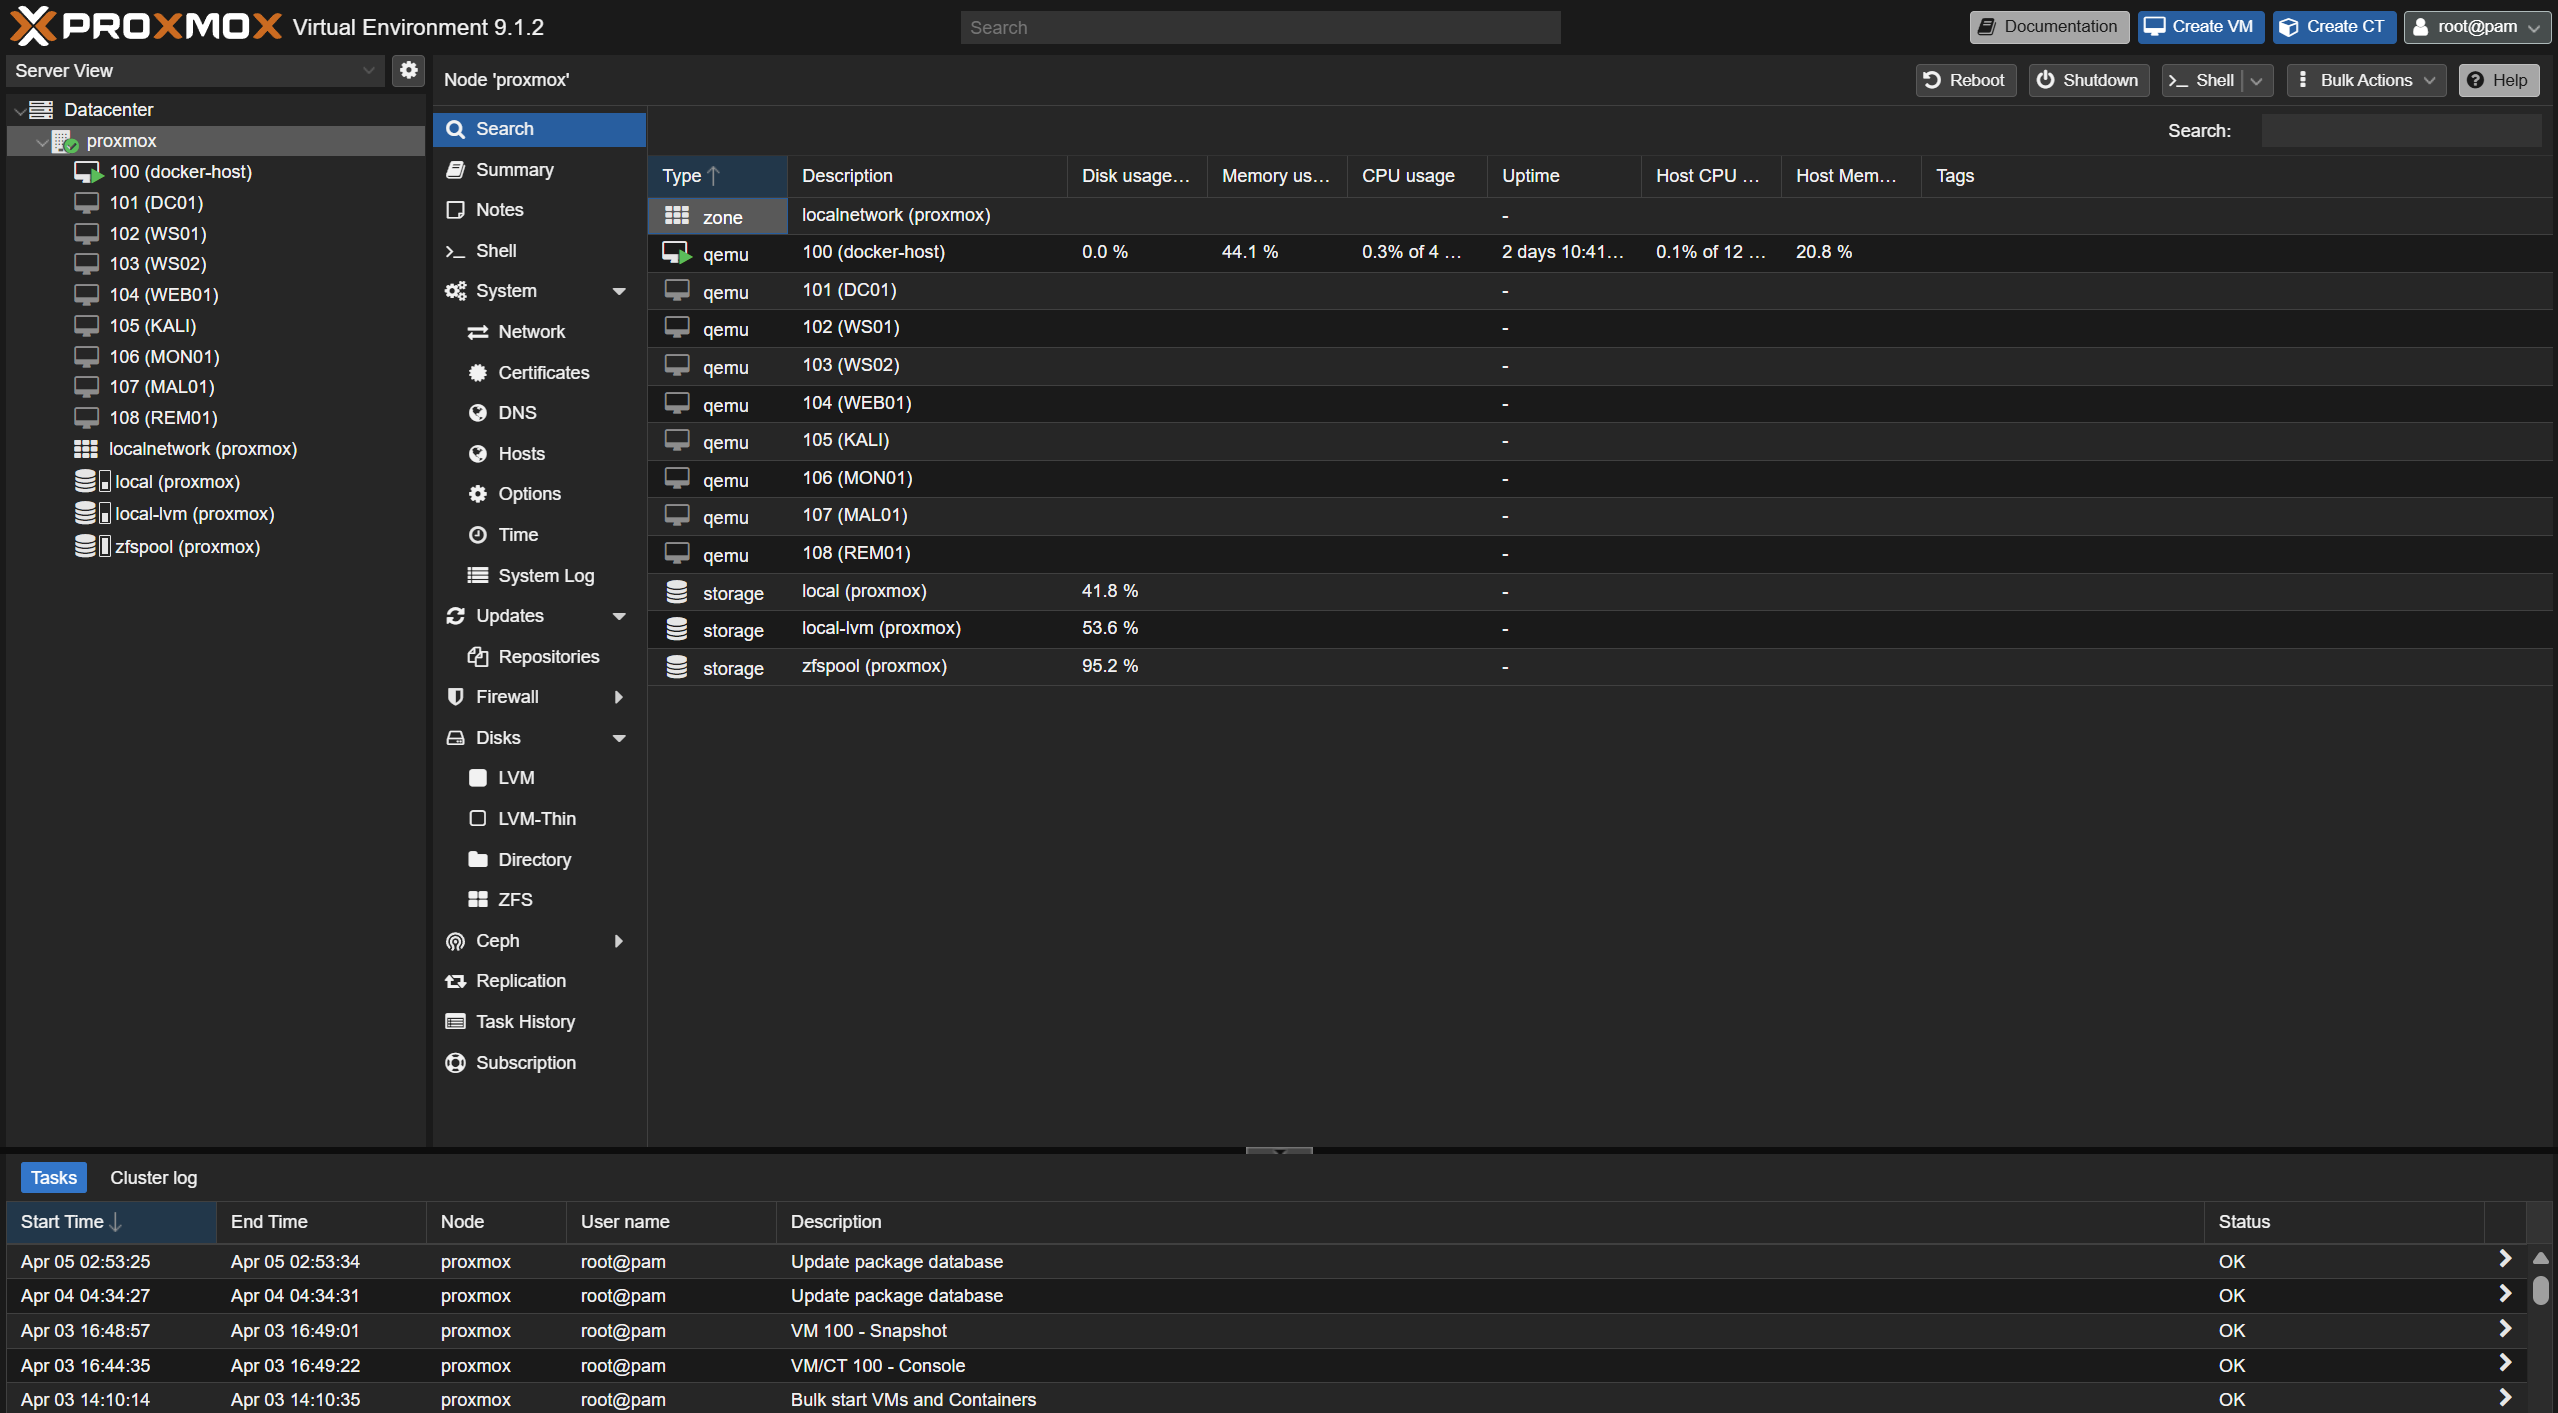
The lab consists of:
- Proxmox VE as the hypervisor
- Segmented internal networks for isolation
- Active Directory environment
- Monitoring stack (Wazuh + Suricata + Sysmon)
- Dedicated attacker VM (Kali)
- Isolated malware analysis environment (MAL01 + REMnux)
This architecture mirrors real environments where production systems, monitoring infrastructure, and high-risk analysis zones are strictly separated.
Architecture Diagram
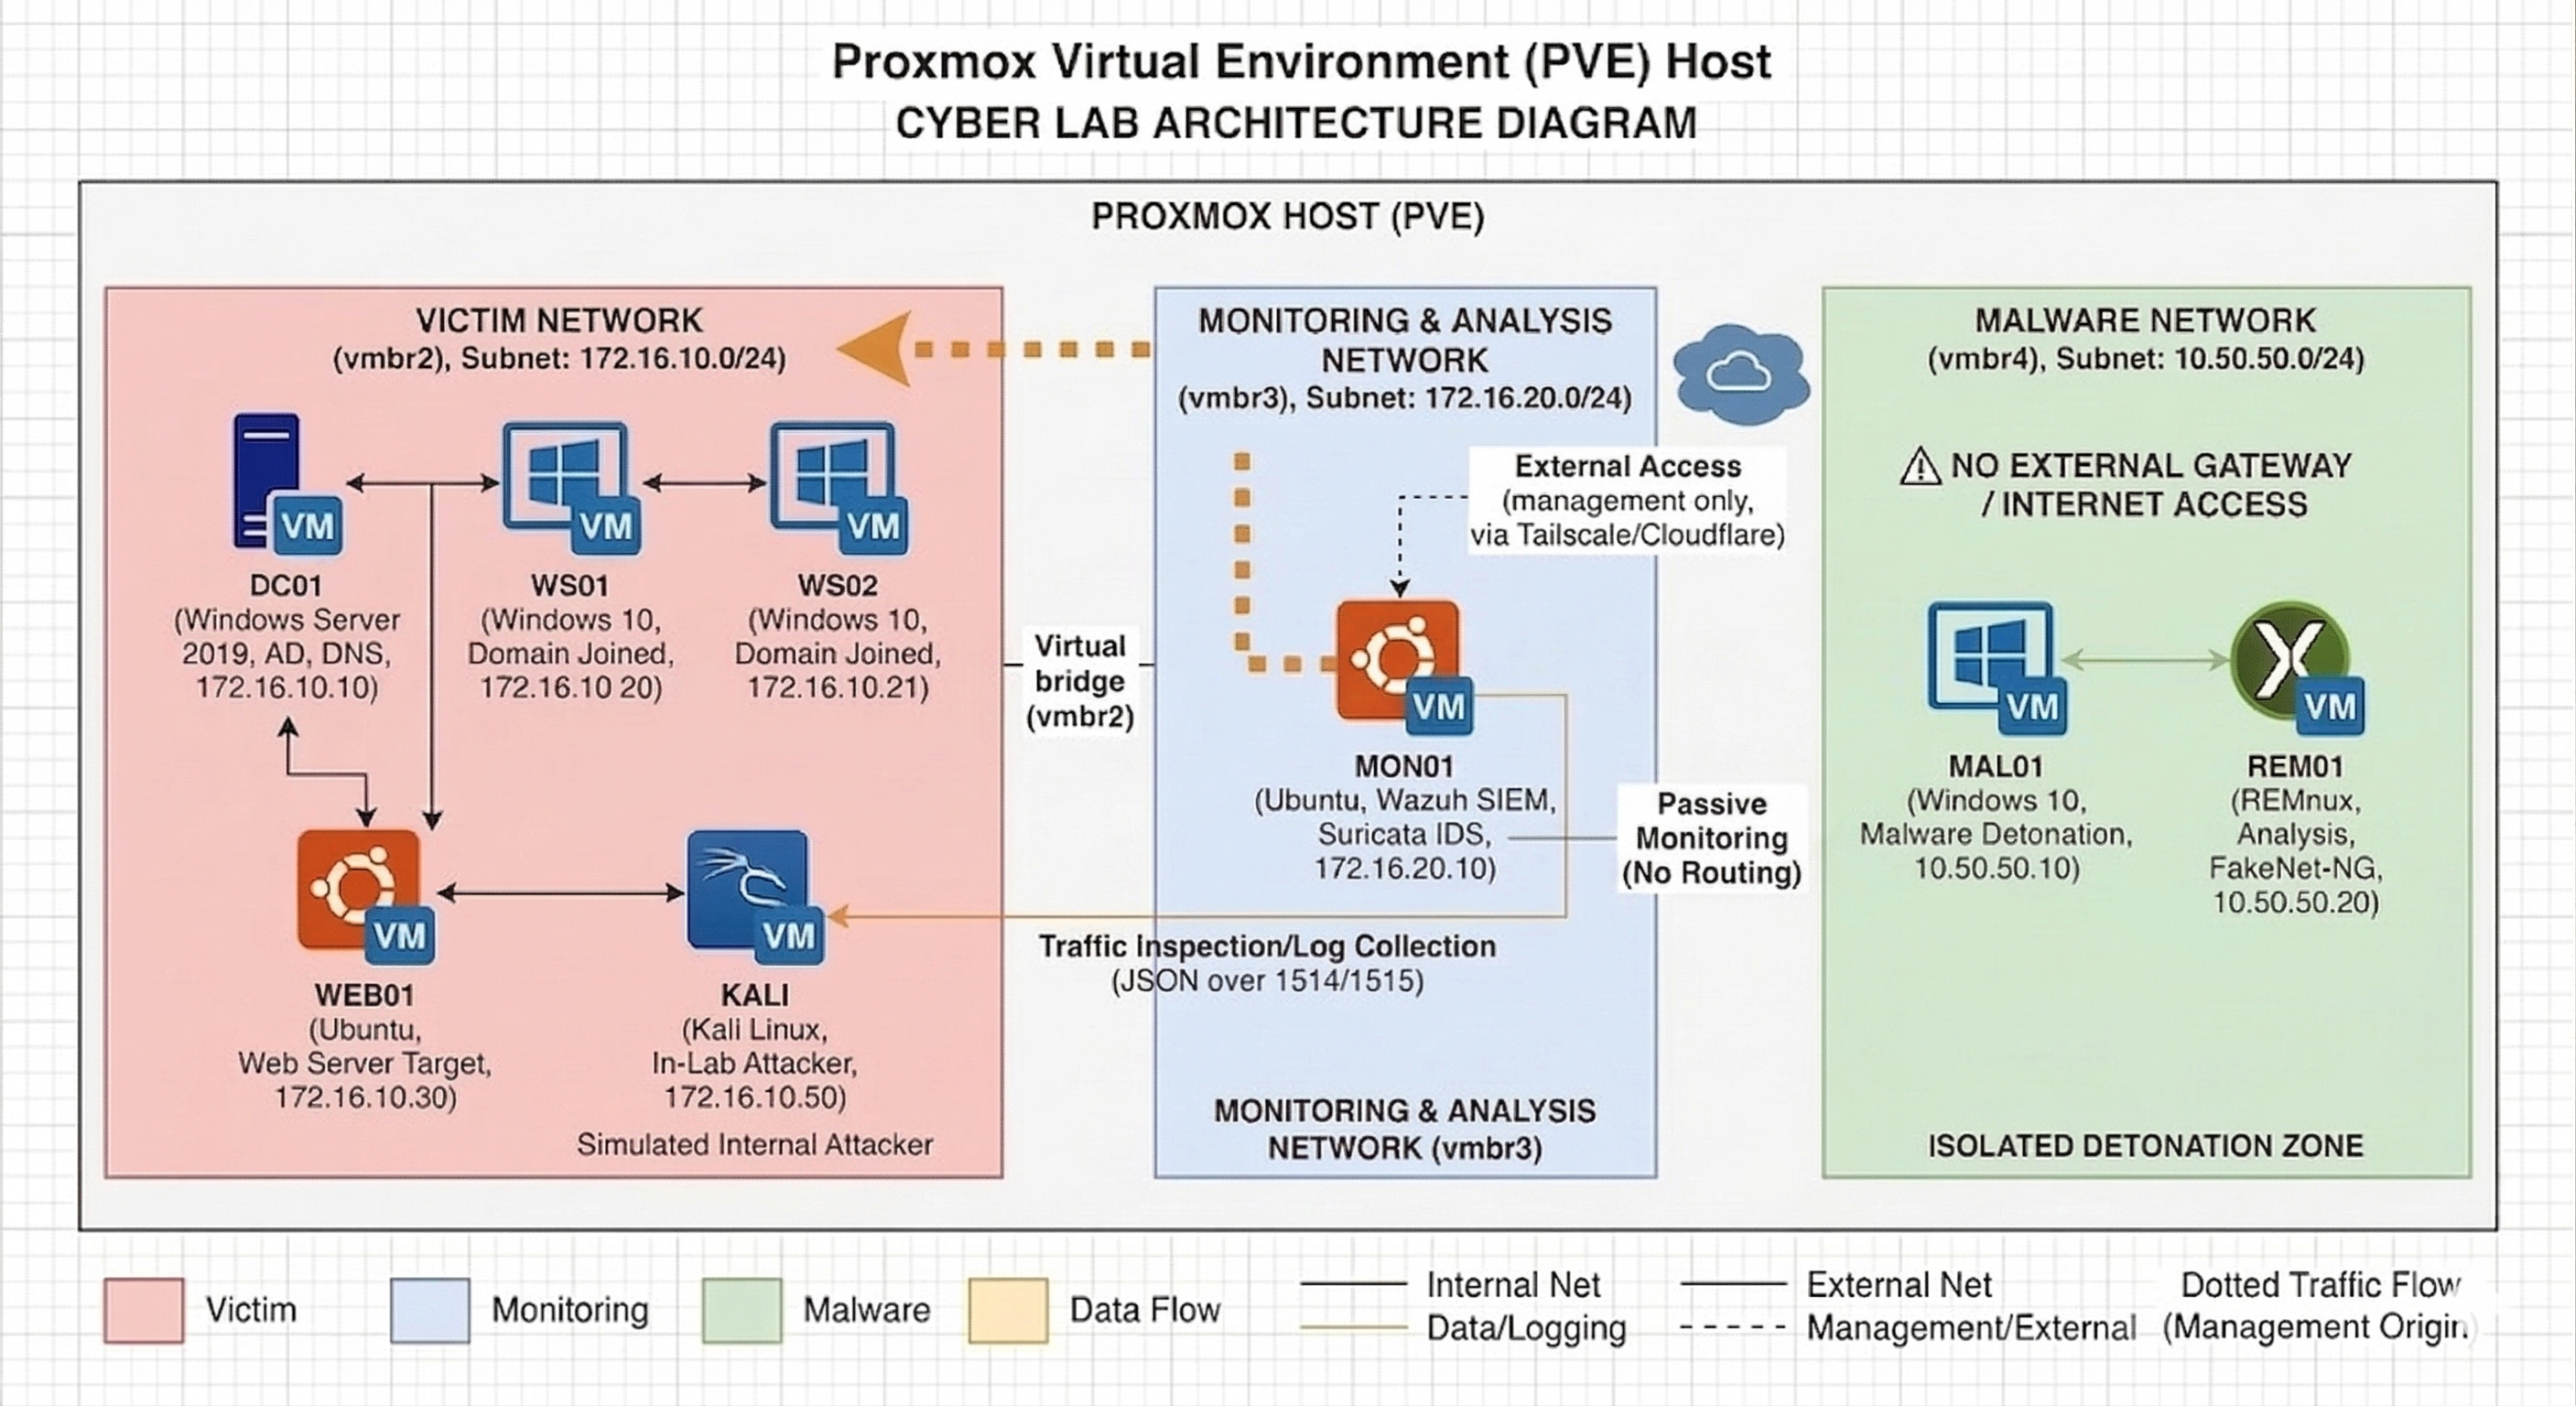
1. Lab Architecture Design
The lab is segmented into three isolated zones:
Victim Network (vmbr2)
- Subnet:
172.16.10.0/24 - Simulates an internal enterprise environment
Systems:
- DC01 (Domain Controller)
- WS01, WS02 (Workstations)
- WEB01 (Linux web server)
- KALI (Attacker VM)
Monitoring Network (vmbr3)
- Subnet:
172.16.20.0/24
System:
- MON01 (Monitoring server)
MON01 uses dual interfaces:
- vmbr3 → monitoring network
- vmbr2 → direct visibility into victim traffic
Malware Network (vmbr4)
- Subnet:
10.50.50.0/24
Systems:
- MAL01 (Windows detonation VM)
- REM01 (REMnux analysis VM)
This segmentation ensures controlled experimentation while reflecting real-world isolation between production, monitoring, and high-risk environments.
2. Proxmox Network Segmentation
Dedicated Linux bridges were created:
vmbr2→ victim networkvmbr3→ monitoring networkvmbr4→ malware network
Key design decision:
- No physical NIC attached
- No gateway configured
This ensures complete isolation from external networks, preventing accidental exposure.
3. Building the Domain Controller (DC01)
A Windows Server 2019 VM was configured as the domain controller.
Roles:
- Active Directory Domain Services
- DNS
- Authentication
Configuration:
- Domain:
corp.local - IP:
172.16.10.10
A snapshot was taken after setup to preserve a clean baseline.
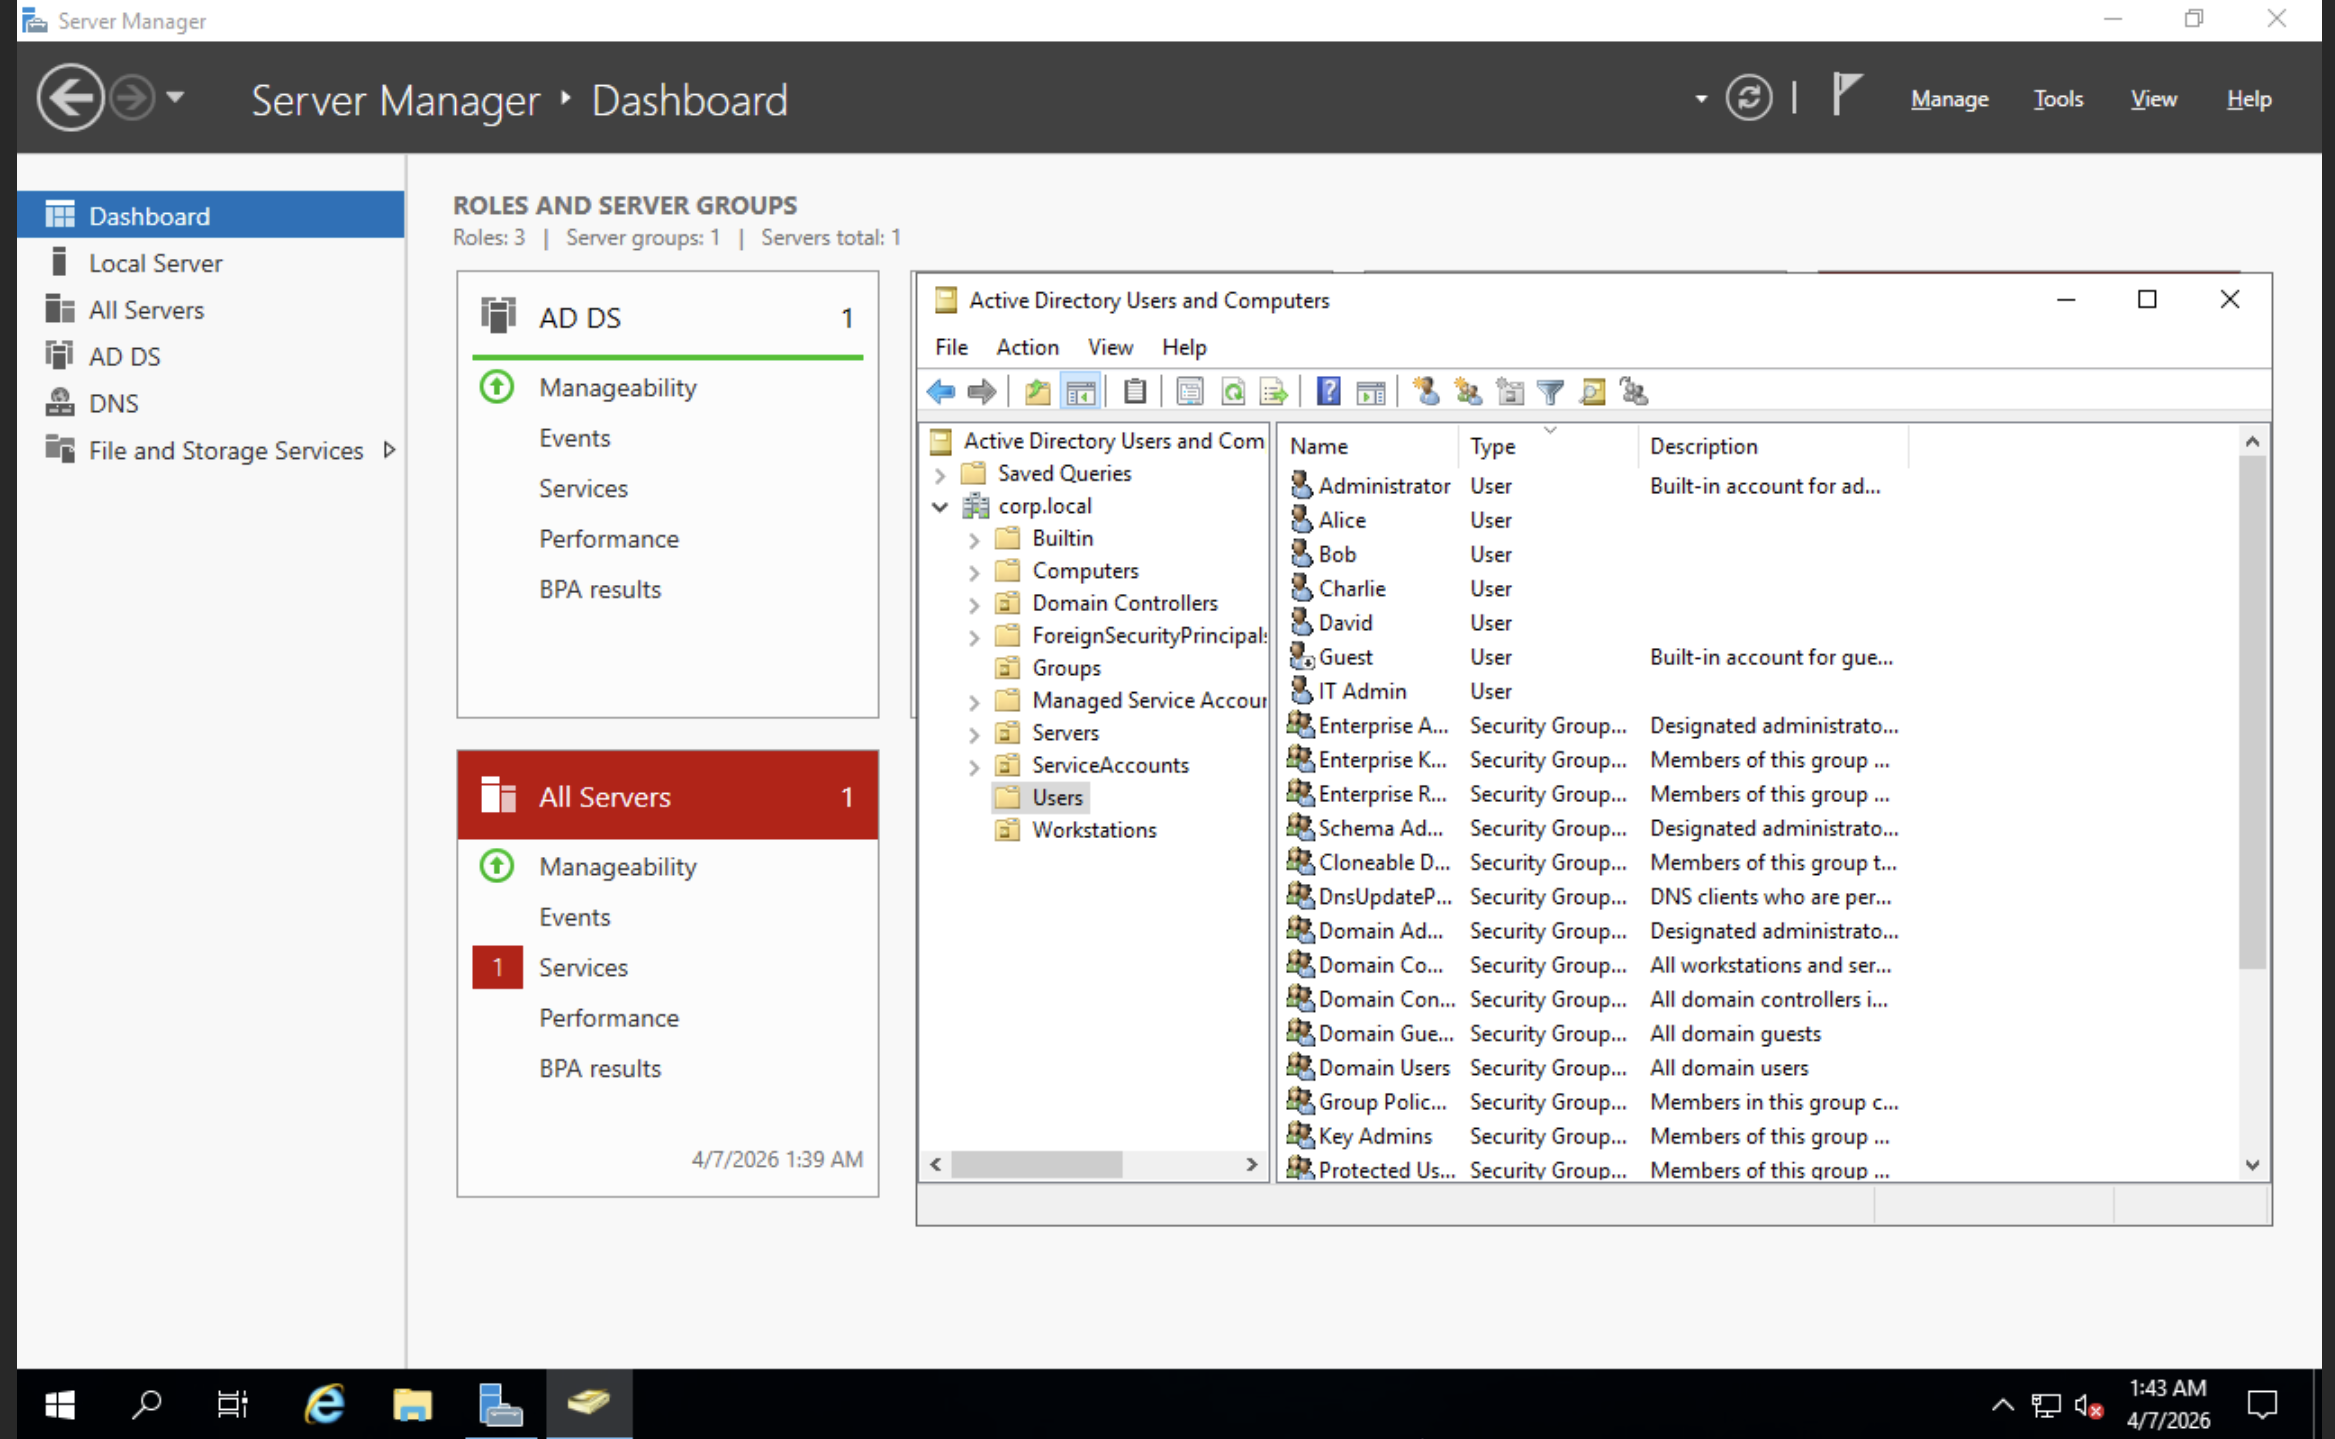
4. Configuring Active Directory Environment
To simulate a realistic enterprise:
Organizational Units
- Servers
- Workstations
- Users
- ServiceAccounts
- Groups
Users
- alice
- bob
- charlie
- david
Service Accounts
- svc_sql
- svc_backup
Admin
- itadmin (Domain Admins)
This structure enables realistic identity and privilege-based attack scenarios.
5. Creating Domain Workstations
Two Windows 10 systems:
- WS01 →
172.16.10.20 - WS02 →
172.16.10.21
Configured with:
- Static IPs
- DNS pointing to DC01
- Joined to
corp.local
This enables authentication flows and lateral movement simulation.
6. Adding WEB01 (Linux Target)
An Ubuntu Server VM:
- IP:
172.16.10.30
Purpose:
- Web attack surface simulation
- Hosting vulnerable applications
- Expanding beyond Windows-only scenarios
7. Adding Kali (Attacker VM)
Kali was placed inside the victim network:
- IP:
172.16.10.50
Benefits:
- Internal attack simulation
- Pivoting scenarios
- Fully self-contained lab
8. Building the Monitoring Stack (MON01)
The core of the detection layer.
Configuration:
- vmbr3 →
172.16.20.10 - vmbr2 →
172.16.10.40
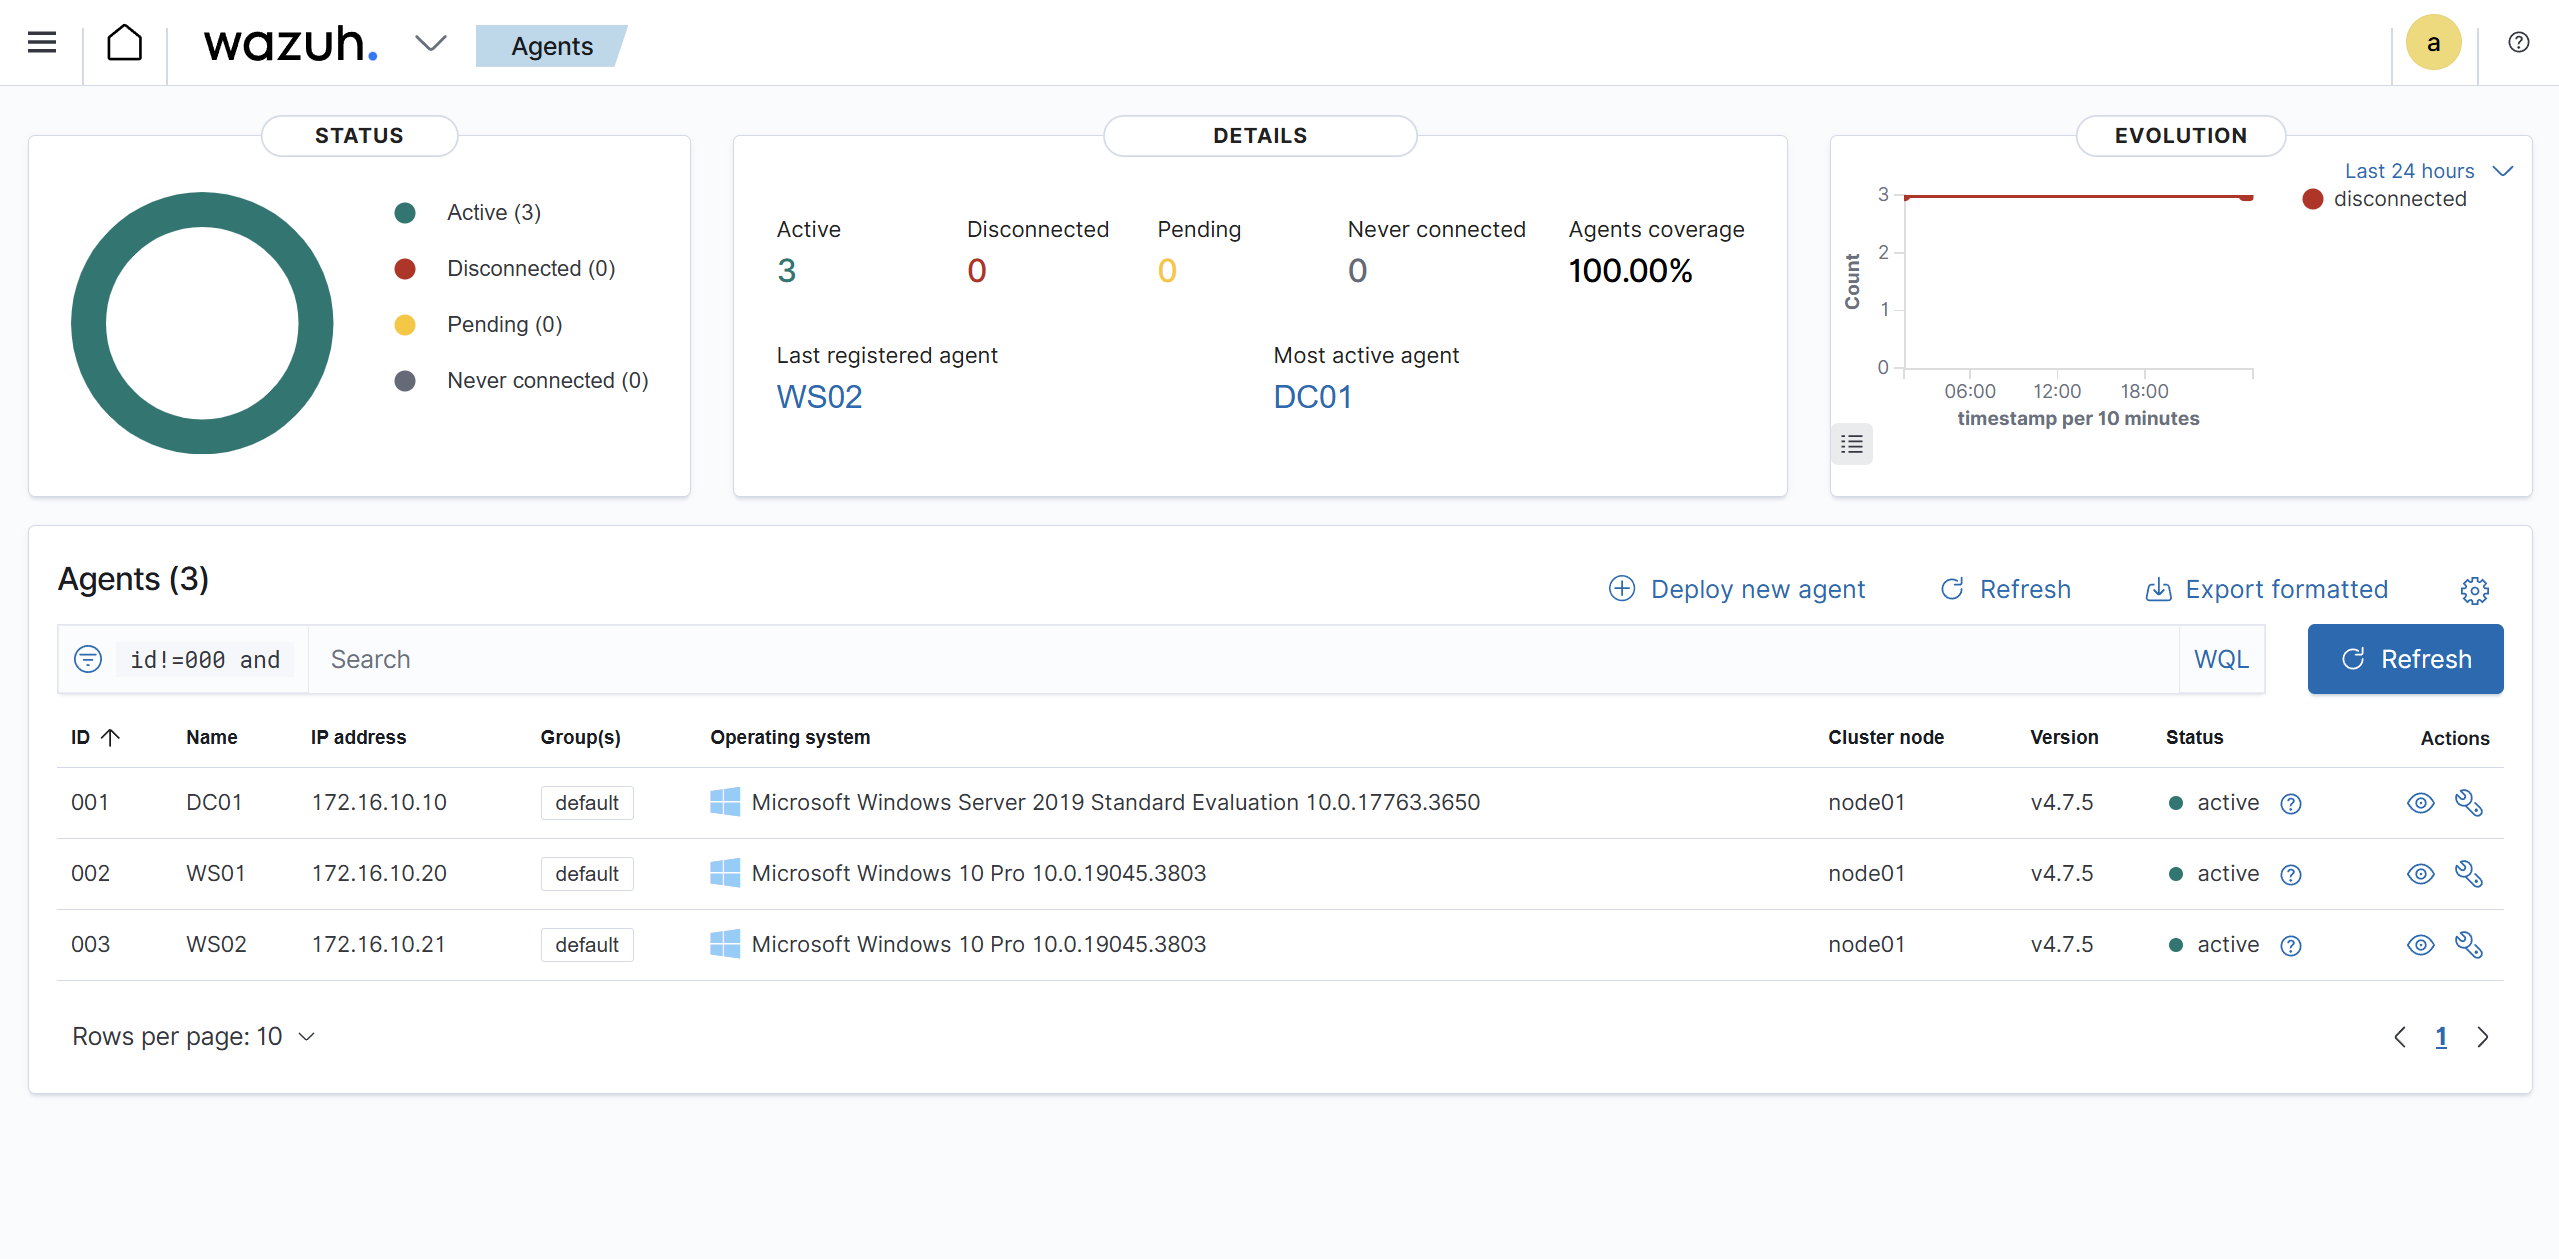
Tools
- Wazuh → SIEM + dashboard
- Sysmon → endpoint telemetry
- Suricata → network IDS
Key Design Decisions
- IP forwarding disabled (prevents pivoting)
- Firewall restrictions applied
- Monitoring-only role (no active participation)
This ensures MON01 provides visibility without becoming an attack path, maintaining monitoring without introducing additional risk.
9. Malware Detonation Environment (MAL01)
A dedicated Windows analysis VM:
- IP:
10.50.50.10 - Network: vmbr4
Tools
- Sysmon
- Sysinternals Suite
- Wireshark
- FakeNet-NG
- PE analysis tools
- Debuggers
Security measures:
- No external connectivity
- Defender disabled (controlled testing)
- Snapshot for rollback
10. REMnux Analysis VM
REM01 complements malware analysis:
- IP:
10.50.50.20
Used for:
- Network simulation
- Static + dynamic analysis
- Traffic inspection
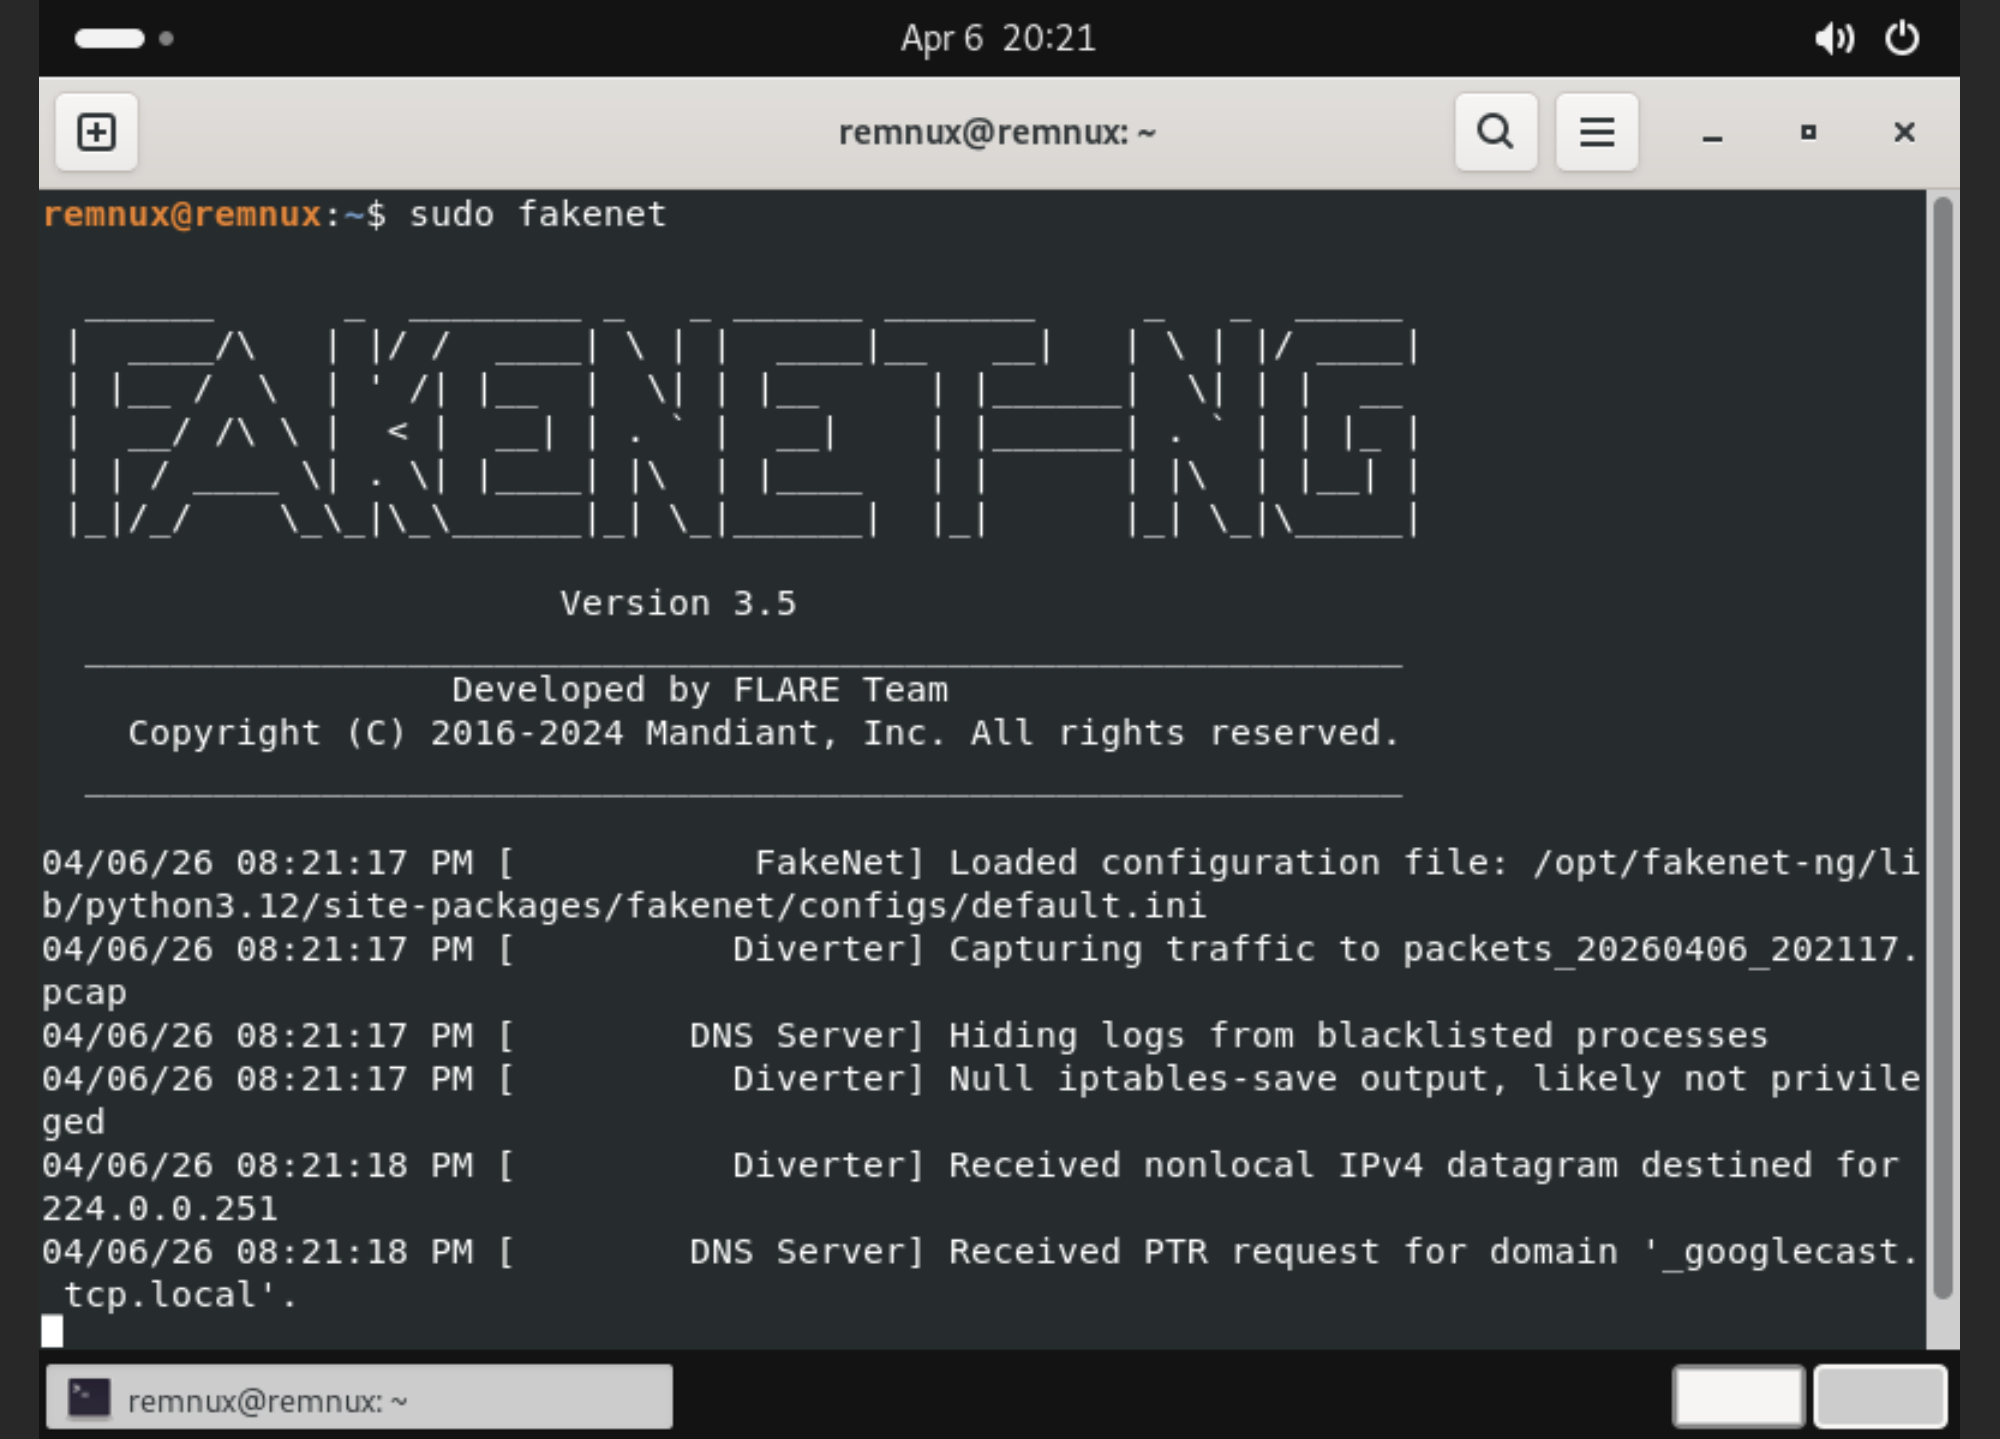
FakeNet-NG simulates internet services, allowing safe observation of malware network behavior without real external communication.
Final Lab Layout
Victim Network
- DC01 → 172.16.10.10
- WS01 → 172.16.10.20
- WS02 → 172.16.10.21
- WEB01 → 172.16.10.30
- MON01 → 172.16.10.40
- KALI → 172.16.10.50
Monitoring Network
- MON01 → 172.16.20.10
Malware Network
- MAL01 → 10.50.50.10
- REM01 → 10.50.50.20
What This Lab Enables
- Active Directory attack simulation
- Lateral movement analysis
- SIEM-based detection workflows
- Endpoint telemetry analysis
- Network traffic inspection
- Safe malware detonation
- End-to-end attacker-to-defender visibility
What Makes This Lab Different
- Designed with segmentation from the beginning instead of a flat network
- Includes both offensive (Kali) and defensive (Wazuh, Suricata, Sysmon) components
- Dedicated malware analysis zone instead of mixing environments
- Focused on visibility and detection, not just exploitation
The environment enables safe experimentation across the full attack lifecycle, from initial access to detection and analysis.
Key Takeaways
- Segmentation matters more than scale
- Visibility is more valuable than adding targets
- Snapshots enable safe experimentation
- Realism comes from architecture, not complexity
- Security requires understanding both attacker and defender
Conclusion
This lab evolved from a simple setup into a structured environment that reflects real-world architecture.
The key takeaway is not just deploying systems, but understanding how they interact, how they are monitored, and how they can be safely tested.
This foundation can now be extended into detection engineering, advanced attack simulations, and incident response workflows.